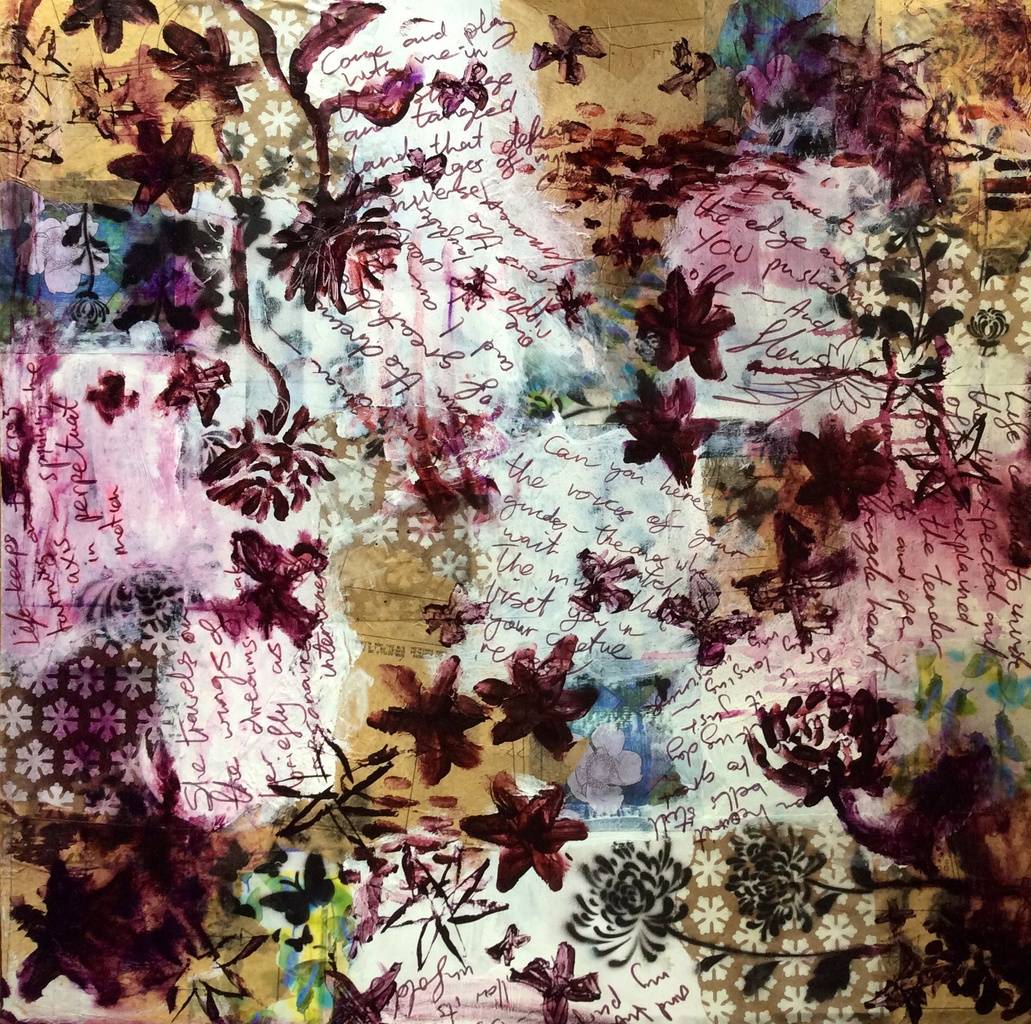
Continuing my large square mixed media acrylic painting.
This is the next stage of the piece. Each stage needs to be added to dry fully before proceeding to the next point. I spend time in developing the detailed layered background from an intuitive playful space before I start searching for the images that want to be revealed. At this stage the colors are kept fairly limited until the third stage in the process. But of course you never know where the muse may take you so rather than a colored black overlay I have a rich mahogany. Not sure where this will go so sharing the process is a bit scary as there really is no set pattern. This is a guide and a ‘come what may’ of changes, new ideas and possibilities.
Step 6:
- With a black permanent marker write words in several spaces on the canvas where there are white spaces. The words can simply be intuitive flow that fit what I feel about the work so far. Another way of doing this is to choose a book and open it up and randomly point to some words and copy these onto the canvas. Turn the canvas regularly and add several more blocks of words. Be conscious of creating a sense of balance
Step 7:
- Put a barrier cream on your hands or a good quality hand cream. Now the choice is which colored black to use according to the base collage pallet that you have already established. I avoid black paint as it lacks the vibrancy of a mixed black…yes I did use it as a spray paint…rules are meant to work for you not make your creativity harder. I could use paynes grey for its blue tones but a couple of possible black combinations I use are:
Quinacridone burnt orange and pthalo
Pthalo and quinacridone crimson
Quinacridone crimson and green
I looked at the possibilities and started to experiment with dioxazine purple and quinacridone burnt orange and so ended up with a deep mahogany so I went with it. No not a colored black but what a lovely possibility to expand and shift my palette.
- Place some fluid acrylic on your palette ( I use a watercolour paper pad so I am creating another painting base to use in another piece). With your fingers draw some repeated shapes in different areas of the canvas. If possible repeat some of the imagery from the collage papers of ad some of your own symbols. Now repeat the same symbols using a brush held loosely and a bamboo stick. The idea is to build a variety of marks and continue to move around the canvas in order to maintain a balance of darks and light and detailed areas. I found that I ended up using a small rubber shaper to paint the butterfly shapes.
Step 8:
- Load your fingers with paint and created areas of dots in different areas continuing to focus on balancing your composition. Remember your finger prints are unique and this is a nice way of adding your own unique mark. Remember to keep turning the canvas. Wipe your fingers on the edge if the canvas. Use a water spray bootle to spray areas of the colours and enjoy what happens
Step 9:
- Leave to dry thoroughly before starting to add more color layers. Don’t get attached to anything yet as it will change a lot before it is finished. Most of all, enjoy the process.
Slowly learning to format as I go… Hope my process gives you some ideas to spark your inner child and sends you on a playful adventure. If you do, please share your experience. Love to hear what others are doing….enjoy every moment!


Your work is beautiful. I am really enjoying to watch this piece develop. I enjoy doing at very much too. Has been tough to find time the last few days to work on pieces I am busy with. Seeing your work has definitely inspired me to sit down and make time for it tomorrow.
Thanks..I love SARK’s idea of micro movements…those little movements we make that help us find the time to create no matter how crazy life gets especially at this time of year. I am always looking for a way to allow time to play.
Hi, just wondering how your weekend art play went and hoping to see what you created. Hope it was a productive and fun weekend.